
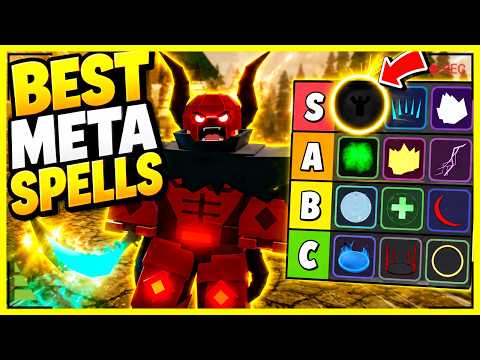
Spell area of effect mechanics determine whether you clear a dungeon room in seconds or spend minutes chipping away at scattered enemies. In Dungeon Quest Reborn, the difference between a mediocre spell setup and a perfectly optimized one often comes down to understanding how AOE radius, damage falloff, and targeting interact within each dungeon environment. Whether you're grinding through Desert Temple's cramped corridors or handling Pirate Island's sprawling deck encounters, your spell selection directly impacts farming speed, resource efficiency, and overall survival rate. This guide breaks down every AOE-relevant spell mechanic, ranks the strongest options for both farming and boss encounters, and provides actionable strategies to help you dominate any dungeon layout you encounter.
What Is Spell Area of Effect in Dungeon Quest Reborn
Spell area of effect refers to the zone in which a spell can deal damage or apply its primary effect to multiple targets simultaneously. Unlike single-target abilities that strike one enemy at a time, AOE spells create a burst zone, line, or aura that can hit every enemy within its defined radius or reach. Understanding the precise dimensions and behavior of these zones is essential for maximizing damage output during room clears, where every second counts toward efficient dungeon runs.
The game categorizes spell AOE into three primary shapes, each with distinct advantages depending on enemy positioning and dungeon geometry. Circular explosions create omnidirectional coverage centered on the impact point, making them ideal for clustered groups in open areas. Cone-shaped attacks extend forward in a directional wedge, perfect for corridor encounters where enemies approach in lines. Line-of-effect beams stretch across the battlefield in a straight path, excellent for hitting enemies standing behind cover or arranged in rows.
Beyond shape, AOE spells in Dungeon Quest Reborn vary significantly in radius size, measured in game units. Smaller radii between 8-12 units excel at precise strikes against tight clusters, while larger radii spanning 20+ units can blanket entire room sections. Some spells also feature damage falloff, where enemies at the outer edge of the AOE take reduced damage compared to those at the center. This mechanic rewards accurate spell placement rather than simply casting toward enemy groups.
The Mage class has access to the broadest AOE spell library in Dungeon Quest Reborn, though Warrior players can compensate with melee-friendly area abilities. Your choice of class directly influences which spell archetypes you can unlock, making the class tier list worth reviewing if you're deciding between builds or seeking to optimize your current setup.
Best Spells for Farming in Dungeon Quest Reborn
Farming efficiency in Dungeon Quest Reborn hinges on one core principle: killing room enemies as fast as possible to minimize downtime between combat phases. The best spell for farming combines wide AOE coverage, short cooldown timers, and reliable damage output that doesn't require precise aim. Several spells stand out as particularly effective for this purpose, each excelling in specific dungeon environments.
Frost Nova ranks among the top farming spells due to its massive circular AOE centered directly on the player character. This self-centered burst triggers an immediate freeze-and-damage effect in a 15-unit radius, hitting every enemy within melee range simultaneously. The spell's 8-second cooldown allows nearly every room to begin with a fresh cast, and its instant activation means you don't need line of sight to maximize effectiveness. Community testing confirms that Frost Nova consistently clears entire Desert Temple corridors in a single cast when enemies are positioned within standard engagement range.
Meteor Strike offers slightly smaller coverage than Frost Nova but compensates with significantly higher damage potential. This spell summons a meteor at the targeted location, creating a 12-unit explosion radius upon impact. The 12-second cooldown is longer, but each meteor deals enough burst damage to eliminate even elite enemies in one hit during early dungeon stages. Pirate Island players favor Meteor Strike for its ability to destroy weapon and equipment racks while simultaneously eliminating nearby enemies, streamlining loot collection routes.
Chain Lightning provides a unique AOE experience through its bounce mechanics. The spell initially strikes one target, then automatically chains to up to four additional enemies within 10 units of each previously hit enemy. This creates an expanding damage web that can clear scattered enemy formations far more efficiently than stationary AOE spells. Winter Outpost's frozen corridors, where enemies often spread across multiple elevation levels, benefit tremendously from Chain Lightning's three-dimensional targeting behavior.
| Spell Name | AOE Radius | Cooldown | Damage Type | Best Dungeon |
|---|---|---|---|---|
| Frost Nova | 15 units | 8 seconds | Ice | Desert Temple |
| Meteor Strike | 12 units | 12 seconds | Fire | Pirate Island |
| Chain Lightning | 10 units bounce | 10 seconds | Lightning | Winter Outpost |
| Blizzard Aura | 20 units | 15 seconds | Ice | All Dungeons |
| Earthquake | 18 units | 14 seconds | Physical | Desert Temple |
When selecting your farming spell, consider the enemy density patterns of your target dungeon. Desert Temple features tight clusters of skeleton warriors and mummy guardians that respond well to circular AOE. Pirate Island's pirate crews often spread across ship deck sections, making Meteor Strike's targeted placement more valuable than self-centered bursts. Winter Outpost's ice golem formations frequently employ spread-out positioning, where Chain Lightning's bouncing behavior eliminates the need to chase individual targets.
Best Spells for Bossing in Dungeon Quest Reborn
Boss encounters in Dungeon Quest Reborn present fundamentally different challenges than standard room clears, requiring spells that can deliver sustained damage to single high-HP targets while maintaining reasonable mana efficiency. Area of effect remains relevant for boss phases that summon add enemies, but the primary focus shifts toward damage-per-second optimization and spell animation cancel compatibility.
Inferno Beam emerges as the top bossing spell due to its extended-duration damage-over-time component combined with a solid initial AOE hit. The spell projects a continuous flame stream for 3 seconds, dealing damage to all enemies within its narrow 6-unit-wide corridor. While the coverage is smaller than farming-focused AOE spells, Inferno Beam's 450% total damage multiplier over its duration makes it the highest raw damage option available for sustained single-target pressure. Bosses vulnerable to burn effects receive additional tick damage, pushing effective DPS even higher.
Shadow Burst offers a middle ground between AOE and single-target optimization, making it versatile for bosses with frequent add spawns. This spell creates a 10-unit explosion at the target location, immediately dealing substantial damage before leaving a shadow zone that persists for 4 seconds. Any enemy entering the shadow zone takes continuous damage, allowing a single Shadow Burst cast to handle both the initial boss damage phase and subsequent add management. The 10-second cooldown strikes a balance between uptime and burst window management.
Thunder Clap deserves recognition for its unique knockback AOE that disrupts boss attack patterns while dealing respectable damage. In boss encounters where certain abilities require the boss to remain stationary, Thunder Clap's knockback effect can cancel charge-up animations, buying additional damage windows. The 14-unit radius also ensures that summoned adds are immediately pushed away from the boss, preventing the common scenario where adds interrupt your damage rotations.
| Spell Name | Primary AOE | Add Control | Boss DPS Rating | Cooldown |
|---|---|---|---|---|
| Inferno Beam | 6-unit beam | None | S-Tier | 9 seconds |
| Shadow Burst | 10-unit burst + 4s zone | 10-unit zone | A-Tier | 10 seconds |
| Thunder Clap | 14-unit + knockback | 14-unit push | A-Tier | 11 seconds |
| Void Collapse | 8-unit implosion | Slow zone | B-Tier | 13 seconds |
| Holy Explosion | 12-unit radiant | Stun on hit | B-Tier | 12 seconds |
Boss strategy extends beyond spell selection to include animation canceling and spell queue timing. The spell animation guide covers advanced techniques for interrupting spell cast animations without losing the spell's effect, allowing faster damage rotations during boss vulnerability phases. Mastering these techniques can increase effective DPS by 15-20% compared to players who wait for full animation completion before casting again.
Spell Drop Rates and Where to Find Them
Understanding spell drop rates in Dungeon Quest Reborn helps you plan efficient farming routes and set realistic expectations for acquiring specific spells. Drop rates vary significantly between dungeon difficulties, enemy types, and whether you're farming regular enemies or boss encounters. This section breaks down the current known drop mechanics to maximize your farming efficiency.
Boss-exclusive spells generally feature the lowest drop rates in the game, ranging from 2-5% on standard difficulty and scaling up to 8-15% on nightmare difficulty. These high-value spells often include the most powerful AOE variants, making boss farming worthwhile despite the time investment. The Desert Temple's final boss, Anubis, drops the coveted Sarcophagus Crush spell at approximately 3% on normal and 10% on nightmare, according to community reports from extensive boss kill tracking.
Elite enemies scattered throughout each dungeon provide intermediate drop rates between 5-10% on standard difficulty. These enemies typically spawn in specific room configurations and feature enhanced health pools compared to regular enemies. The spell drop locations guide maps out elite spawn patterns for each dungeon, helping you identify the most efficient routes for targeting specific spell types without clearing unnecessary rooms.
Regular enemy drops account for the majority of spell acquisitions for new players, with drop rates between 1-3% per kill. While individual drop chances seem low, the high enemy count per dungeon run makes cumulative acquisition rates reasonable. Experienced farmers report acquiring 1-2 spells per 10 dungeon runs through regular enemy farming alone, with variance accounting for significant swings in either direction.
| Drop Source | Standard Difficulty | Nightmare Difficulty | Average Runs Per Drop |
|---|---|---|---|
| Boss Kills | 2-5% | 8-15% | 15-25 runs |
| Elite Enemies | 5-10% | 12-18% | 8-12 runs |
| Regular Enemies | 1-3% | 3-6% | 30-50 runs |
| Chest Loot | 15-25% | 25-40% | 3-5 opens |
| Daily Rewards | Guaranteed | Guaranteed | 1 per day |
Chest drops represent the most reliable spell acquisition method, with drop rates significantly higher than enemy kills. Gold chests found upon dungeon completion grant 15-25% spell drop chances, while diamond chests in secret rooms boost these odds to 25-40%. Players prioritizing spell collection should always explore every side room and check for hidden passages that might contain chest spawns, as the time investment often yields better returns than additional enemy kills in the main dungeon path.
New Spells Update and Unobtainable Spells
The Dungeon Quest Reborn development team regularly introduces new spells through content updates, rotating seasonal events, and balance patches. Staying informed about upcoming spell additions helps you plan future farming priorities and adapt your build strategy as the meta evolves. Equally important is understanding which spells have been removed from the active drop tables and now fall into the unobtainable category.
Recent updates have introduced Void Magic spells as the newest spell archetype, featuring unique gravity manipulation effects that pull enemies toward the cast point before releasing them in an explosive burst. These spells excel in both farming and boss scenarios due to their crowd control utility, though their recent addition means drop rates remain relatively low as the community supply builds up. Players seeking cutting-edge spell options should focus farming efforts on the newest dungeon releases where these spells primarily drop.
Unobtainable spells in Dungeon Quest Reborn typically result from limited-time event exclusivity or significant balance reworks that removed certain spell types from the game. Legacy spells from the original Dungeon Quest that haven't been ported to the Reborn version fall into this category, much to the disappointment of returning players who remember their favorite abilities. Community speculation suggests eventual reintroduction through anniversary events, but no official timeline has been confirmed.
The transition between Dungeon Quest and Dungeon Quest Reborn introduced several class-specific legacy spells that no longer appear in current drop tables. Warrior players may remember the original Devastate ability, while Mage mains recall the pre-reboot version of Arcane Storm. While these spells remain unobtainable, the development team has introduced comparable alternatives that fill similar gameplay roles, though purists continue requesting legacy spell returns through official feedback channels.
Checking the official Dungeon Quest Reborn page for patch notes and update announcements helps you track when new spells enter the rotation and which legacy abilities might be returning. The game's active player base of 44,000+ players ensures that community resources remain current, with Discord servers and wiki pages typically documenting new additions within hours of major updates.
Pro Tips for Maximizing Spell Effectiveness
Beyond basic spell selection, several advanced techniques can dramatically improve your AOE spell performance in Dungeon Quest Reborn. These optimization strategies require practice to master but deliver measurable improvements in farming speed, boss kill times, and overall damage efficiency. Implementing even one or two of these tips can elevate your gameplay substantially.
Pre-positioning before entering a room allows you to cast AOE spells at optimal angles that maximize enemy coverage. Rather than entering a room and casting reactively, pause at the doorway for 0.5 seconds to assess enemy positions, then cast your farming spell toward the densest cluster. This technique proves particularly valuable in Winter Outpost's ice corridors, where enemies often funnel through narrow passages that benefit from提前 targeted meteor strikes rather than self-centered bursts.
Spell animation canceling lets you interrupt the recovery portion of spell cast animations without losing the spell's damage or effect. By inputting a movement command or weapon attack immediately after your spell fires, you can begin moving or attacking before the animation fully completes. This technique adds approximately 0.3-0.5 seconds to your effective damage rotation, which compounds significantly over a full dungeon run. The spell animation guide provides detailed input sequences for each spell type.
Damage type matching against enemy weaknesses amplifies AOE spell effectiveness substantially. Desert Temple's undead enemies take 50% additional damage from holy and fire spells, while ice creatures in Winter Outpost are vulnerable to fire attacks. Pirate Island's aquatic enemies receive increased damage from lightning spells. Checking dungeon-specific enemy vulnerabilities before selecting your spell loadout ensures you're not fighting at a damage disadvantage.
Multi-spell combo chains leverage the unique AOE characteristics of different spells to create devastating sequential damage. Opening with Frost Nova's large self-centered freeze, immediately following with Meteor Strike's targeted damage on clustered frozen enemies, and finishing with Chain Lightning to clean up scattered survivors creates a smooth three-spell rotation that handles any room configuration. Practice timing these combos until the sequence becomes muscle memory, and your dungeon clear times will decrease noticeably.
Cooldown management through careful spell rotation prevents downtime gaps where you're forced to use basic attacks. Mapping your spell cooldowns and planning the order of casts ensures that one spell comes off cooldown as another finishes, maintaining constant AOE pressure throughout extended encounters. This technique proves especially valuable during boss fights where maintaining consistent DPS prevents the boss from recovering health between damage windows.
| Optimization Technique | Effect on Farming | Effect on Bossing | Difficulty |
|---|---|---|---|
| Pre-positioning | +20-30% room clear speed | +10-15% phase damage | Beginner |
| Animation canceling | +15-20% spells per run | +15-20% DPS output | Intermediate |
| Damage type matching | +50% effective damage | +50% effective damage | Beginner |
| Combo chains | Smoother clears | +25-30% total damage | Advanced |
| Cooldown management | 0 downtime farming | Constant DPS pressure | Intermediate |
FAQ: Frequently Asked Questions About Spell Area of Effect
What determines the size of a spell's area of effect in Dungeon Quest Reborn?
The AOE size is determined by the individual spell's base stats, which cannot be modified through upgrades or equipment. Each spell has a fixed radius or shape defined in its tooltip, measured in game units. Some spells feature scaling AOE based on progression difficulty, with nightmare mode dungeons often increasing spell coverage by 10-15% compared to standard difficulty.
Can I increase my spell's AOE through any in-game mechanic?
Currently, no equipment or upgrade system directly increases spell AOE radius in Dungeon Quest Reborn. However, certain passive skills and class abilities can extend effective coverage indirectly by pulling enemies closer together before casting or increasing movement speed to reposition faster between spell casts.
Which class has access to the best AOE spells for farming efficiency?
The Mage class provides the most comprehensive AOE spell library, with access to circular explosions, cone beams, and bouncing chain attacks. Warrior spells tend toward more single-target focused damage, though abilities like Ground Slam and Whirlwind provide respectable area coverage for melee-focused players.
Are spell drop rates affected by multiplayer party size?
Community testing suggests that spell drop rates remain consistent regardless of party size in Dungeon Quest Reborn. However, larger parties clear dungeons faster, meaning players in four-person groups acquire more drops per hour compared to solo players due to increased dungeon completions rather than improved individual drop odds.
What should I do if a spell I want is currently unobtainable?
Focus on farming spells with similar functionality until the unobtainable spell returns to the active drop table. Seasonal events occasionally reintroduce legacy spells for limited periods, and major updates have historically expanded spell pools with new abilities that fill similar gameplay roles. Checking official patch notes and community forums helps you anticipate when specific spells might become available again.
Mastering spell area of effect mechanics transforms your Dungeon Quest Reborn gameplay from methodical enemy-by-enemy combat into efficient, satisfying room-clearing runs. By understanding AOE shapes, selecting spells matched to your target dungeons, and implementing advanced optimization techniques, you'll notice significant improvements in both farming speed and boss kill times. Combine these strategies with consistent spell farming efforts, and you'll build an impressive spell arsenal that handles any challenge the game's dungeons present.